Installation on Magento 2 via Composer
This guide will show you how to install and configure Kuoll Loss Monitoring extension for Magento 2.
You can install the extension from Kuoll repository using Magento Composer.
1. Make sure you have git and composer installed.
git --version
composer --version
Otherwise, install Git and install Composer.
2. Open terminal/console, go to your Magento installation directory.
cd /path/to/your/magento/root3. Type these two commands in the following order:
composer config repositories.kuoll-loss-monitoring-m2 git "https://github.com/kuoll/magento2-loss-monitoring.git"
composer require kuoll/loss-monitoring:dev-master
4. Once the installation is completed, enable the Kuoll Loss Monitoring module:
bin/magento module:enable Kuoll_LossMonitoring5. Immediately after that, run the setup:upgrade command:
bin/magento setup:upgrade6. And finally, clear the cache:
bin/magento cache:cleanThat’s it, you have successfully installed the Kuoll Loss Monitoring extension. Let’s move to configuration.
Configuration
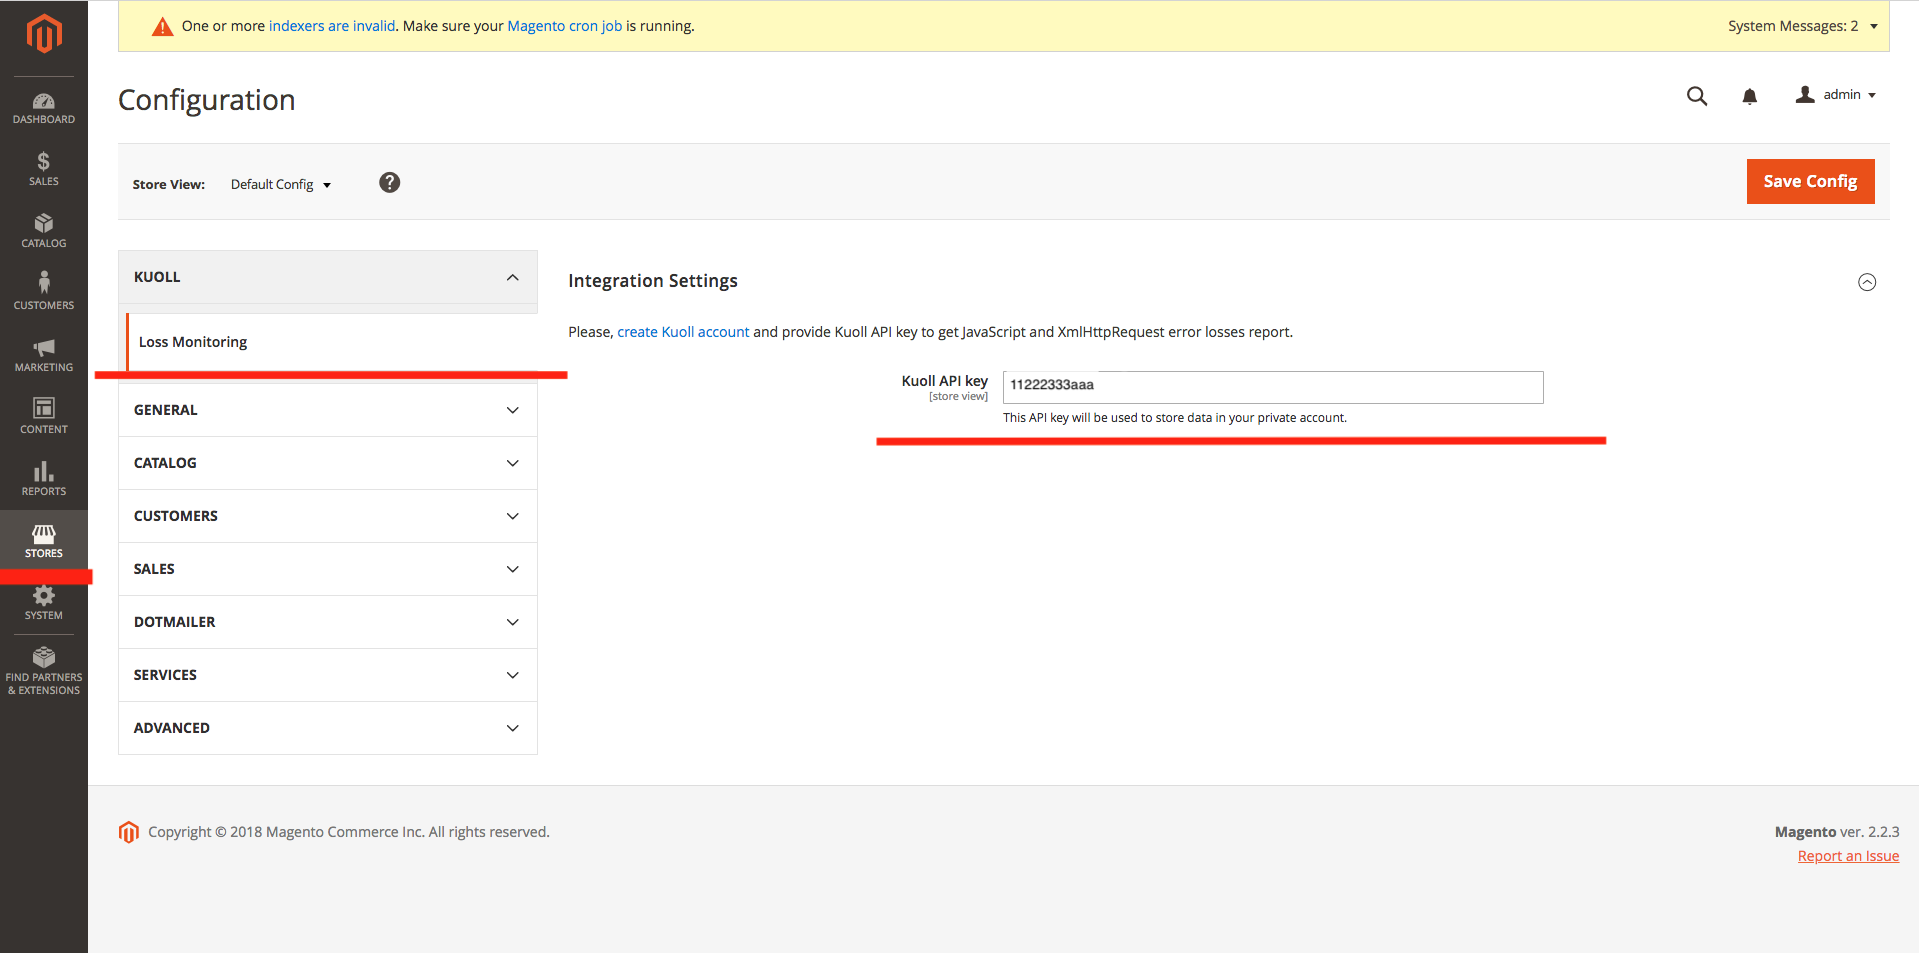
Create Kuoll account, copy and paste your Kuoll API key in the Magento admin panel: Stores→Configuration→Kuoll→Loss Monitoring.
Check the installation
To make sure that installation and configuration was successful please visit your website, check for errors and see if it shows up in Kuoll dashboard. We also suggest you do a test error to make sure the monitoring script is working as well. Wait a couple of minutes after making a test error, to see if it comes up in Kuoll.